Sewing machine mat organiser and thread catcher bin!
- emikodshte
- Sep 5, 2021
- 3 min read

Thank you Kmart placemat! You have been serving me and my heavy Bernina really well! Time for a new change though! :D
Really happy with how this turned out! I love the neutral colours and glad I kept it zakka-style rather than use the very colourful scraps (not quite my style) that I had from a quilting project!
Although I did not plan for the spacing, the mat folds up perfectly to the edge of my machine, and neatly too because of the quilting lines! :D

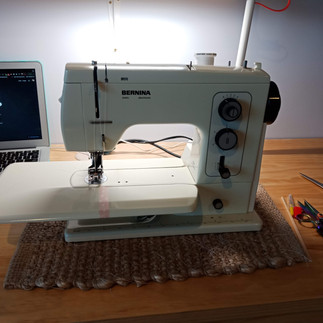


After my recent bigger projects (garments and quilts) and realising that I wanted to solve the untidy issue of having all my tools on the side of the machine, I went to look up on sewing machine mats as I remembered seeing them designed with organisers! :D
After browsing my fabric stash, I decided that I wanted to use a thicker material and ended up choosing these japanese cotton fabrics that I had got from People's Park Complex in Chinatown during one of my trips back to Singapore.
The entire mat measures 17" x 18".
Front fabric (lighter background with leaf prints): 17 x 18"
Fusible fleece: 17 x 18" fused to the front fabric
Backing fabric (darker background with same leaf prints): 2cm more on each of the four sides to accommodate for the binding
Checkered-print fabric for organiser part: 17 x 9", and folded lengthwise
Binding strip for top of organiser part: 17" x 4cm
I had initially taken a photo of all the fabric cuts for this mat, but it didn't get saved! ):
Folded the checkered-print fabric into half lengthwise, and binded the top part as decoration :)
Basted to the front fabric (fused with fusible fleece on the back)

Placed the front fabric on top of the backing fabric, with 2cm excess on all its four sides, and marked where the front fabric will be
Sewed 1 cm down as shown (white stitches)
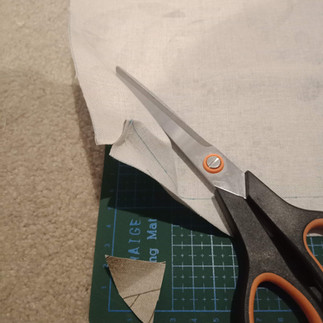
Trimmed the corners


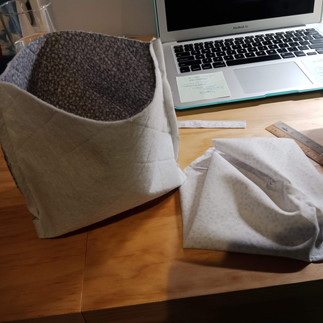
After turning in the corners, I placed the front fabric (basted with organiser), to fit into the backing fabric nicely with its corners mitred! Clipped them all in place.
View from the front
View from the back (backing fabric is of same design but darker colour)


I worried about my scissors and tools poking my stitches, so decided to make a buffer strip for inside of the organiser, like a 'pincushion'.
Used leftover material from a recent quilting project - flannel+batting
Trimmed the strip and sewed, and then placed it at the bottom of the inside of the organiser
Sewed vertical lines to create different sections for my organiser!


Marked gridlines with a 3cm gap on the front fabric using my Pilot Frixion pen (learnt about this from a youtube quilting video! Marks disappear when ironed :D)
Sewed along all the lines!
Grid design visible on the front and back!


But no, something was still lacking! :D
With inspiration from these, I followed this particular thread catcher tutorial with a few modifications!
Two 26 x 21cm pieces of
outer fabric
fusible fleece
lining fabric
(Fabric used is quilting cotton from Spotlight!)
Ironed/fused the outer fabric to the fusible fleece
Drew 45° lines with 3cm spacing
Stitched on them
Made a little strap from the leftovers of the lining fabric


Right sides together, sewed along three sides of the outer fabric
With the inner fabric, left an opening gap of 3" (I got too excited and forgot, and had to seam rip an opening after~)
Pressing down the corners, I marked 1.5" from the tip/point and drew a line and sewed, and trimmed the corners off
Pressed seams open after when I could fold the bag down


Turned the outer bag the right sides out
Placed the outer into the lining bag (right sides together)
Pinned the side seams together first
Almost forgot to add in my strap but thankfully I remembered! Placed it in between the outer & lining bags, at the middle of its length!
Pinned pinned and sewed!


Brought the bag out through the opening of the lining bag and sewed the opening close
Wanted the lining fabric to make a top border, and the seam within made it perfectly easy to fold the lining bag against it :D
Top stitched the top edge/border
Button-choosing time! "I choose you!" Sewed it onto my mat, and decided to sew on some snap fasteners too! XD


XD XD XD *Happy dance*~ Seeing the colours make me so happy!


Comments